Setting up WireGuard client in a LightSail instance

In this post, we will see how we can create a cheap Lightsail instance and then connected to our network using our WireGuard VPN Client. This way we will be able to run tooling applications very cheap and they will be connected to our Network, we will use this one as a template to then install Jenkins, we will see this in another post.
We are using Lightsail but it is very easy to extrapolate and do the same in an EC2 instance, but, usually, if the machines are inside the VPC we do not need to do anything extra here, but perhaps we need to access from there the tooling machine, in that case we can hook up the machine into WireGuard, but if you need this, usually means that you should reconsider your Network Architecture and perhaps the Lightsail machine should be an EC2 intance
“If all you have is a hammer, everything looks like a nail.”
Careful and do not use a Golden Hammer
Create a Lightsail instance
Now we are going to create an LS instance in our favourite (or more convenient) zone, in my case will be Frankfurt.
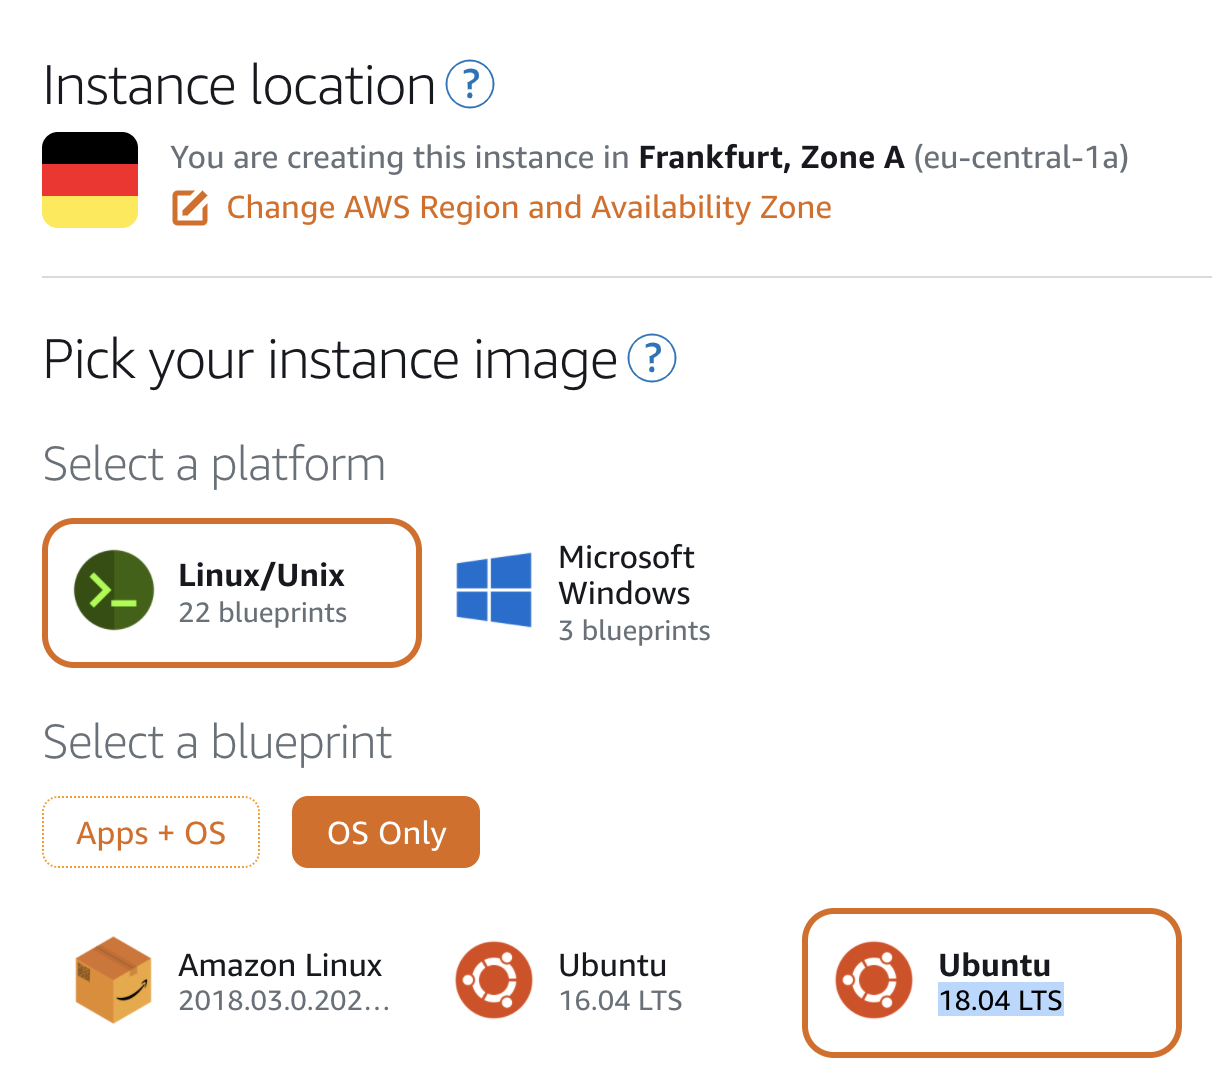 Creating an Ubuntu 18.04 instance in Frankfurt
Select an SSH key pair and select the instance plan
In our case, our lovely 3.5$ instance will be good for us and pick a name: Jenkins-Machine-Frankfurt for example looks like a good one and press over Create Instance.
 Cheap instances for everyone
Now our instance will be created and an IP will be created for it, we do not need to worry too much about the fact it is a dynamic IP since we are going to use WireGuard to access to it and IP Roaming is an amazing thing.
Remember we are using the Rolls Royce of VPNs!
Installing WireGuard in the new instance
1
 ssh -A ubuntu@PUBLIC_IP_OF_NEW_INSTANCE
The first thing we are going to do will be installed WireGuard Client in the Machine and set it up:
1
2
3
$ sudo add-apt-repository ppa:wireguard/wireguard
$ sudo apt update
$ sudo apt install wireguard
Note If you are asked about new versions available you can install the new ones or keep yours, I kept the local version currently installed.
Creating Client configuration files in the WireGuard Server
Now we have 2 main options, we can create the keys from our client and then add into the server OR we can go now to our WireGuard server, create there the configuration file for the client, and store it, and this is what I will do:
Open a new terminal, access your WireGuard server with SSH and add a new client:
1
2
3
4
5
$ ssh -A ubuntu@IP-FOR-WIREGUARD-SERVER
...
ubuntu@ip-privateIp:~ $ sudo ./wireguard-install.sh add-client
Client's WireGuard IPv4: 10.0.100.60
VPC CIDR: 10.0.0.0/16
After waiting a bit you will be presented with the QR code (Super Useful when you are installing it in a Mobile device) and the location of the file, simply less it:
1
ubuntu@ip-privateIp:~ $ sudo less /root/wg0-client.FunkyUniqueLetters.conf
1
2
3
4
5
6
7
8
9
[Interface]
PrivateKey = <Your client private key>
Address = 10.0.100.60/32

[Peer]
PublicKey = <The server public key>
PresharedKey = <A preshared key for ++ security>
Endpoint = <PUBLIC-IP-OF-SERVER>:60005
AllowedIPs = 10.0.0.0/16
Now, we copy this and we go to our client again. The best thing will be to create a file in our home directory called wg0-client.conf and we store the information there.
Install configuration files in your new client instance
We are going to install the file as a configuration file in /etc/wireguard/
1
sudo install -o root -g root -m 600 wg0-client.conf /etc/wireguard/wg0.conf
Enabling WireGuard Client
1
sudo systemctl enable wg-quick@wg0.service
Restart your instance now with sudo restart -h now, you will be kicked out from the SSH connection, wait a bit and connect again. If you run ifconfig now you will see that the Virtual Network Interface of WireGuard has been created:
1
2
3
4
5
6
7
wg0: flags=209<UP,POINTOPOINT,RUNNING,NOARP>  mtu 8921
      inet 10.0.100.60  netmask 255.255.255.0  destination 10.0.100.60
      unspec 00-00-00-00-00-00-00-00-00-00-00-00-00-00-00-00  txqueuelen 1000  (UNSPEC)
      RX packets 0  bytes 0 (0.0 B)
      RX errors 0  dropped 0  overruns 0  frame 0
      TX packets 0  bytes 0 (0.0 B)
      TX errors 0  dropped 0 overruns 0  carrier 0  collisions 0
Now you can run the following command, to hook up the start:
1
sudo systemctl start wg-quick@wg0.service
And then you can check the status:
1
sudo systemctl status wg-quick@wg0.service
Now you should be able to see that the Client is Active:
1
2
3
4
5
6
7
8
9
10
11
wg-quick@wg0.service - WireGuard via wg-quick(8) for wg0
 Loaded: loaded (/lib/systemd/system/wg-quick@.service; indirect; vendor preset: enabled)
 Active: active (exited) since Fri 2020-07-17 09:14:25 UTC; 1min 42s ago
   Docs: man:wg-quick(8)
         man:wg(8)
         https://www.wireguard.com/
         https://www.wireguard.com/quickstart/
         https://git.zx2c4.com/wireguard-tools/about/src/man/wg-quick.8
         https://git.zx2c4.com/wireguard-tools/about/src/man/wg.8
Process: 834 ExecStart=/usr/bin/wg-quick up wg0 (code=exited, status=0/SUCCESS)
Main PID: 834 (code=exited, status=0/SUCCESS)
Commands to control the WireGuard client
Enables the Interface after the restart
1
$ sudo systemctl enable wg-quick@wg0.service
Starts the client
1
$ sudo systemctl start wg-quick@wg0.service
Show client status
1
$ sudo systemctl status wg-quick@wg0.service
Stops the client
1
$ sudo systemctl stop wg-quick@wg0.service
Testing connectivity
Now we should be able to ping using the private IP our server from this client:
1
2
3
4
5
$ ping 10.0.10.80
PING 10.0.10.80 (10.0.10.80) 56(84) bytes of data.
64 bytes from 10.0.10.80: icmp_seq=1 ttl=64 time=1.32 ms
64 bytes from 10.0.10.80: icmp_seq=2 ttl=64 time=0.516 ms
64 bytes from 10.0.10.80: icmp_seq=3 ttl=64 time=0.589 ms
And from YOUR own laptop, if you are connected to the VPN you should be able to Ping this machine also:
1
2
3
4
5
➜  ~ ping 10.0.100.60
  PING 10.0.100.60 (10.0.100.60): 56 data bytes
  64 bytes from 10.0.100.60: icmp_seq=0 ttl=63 time=74.420 ms
  64 bytes from 10.0.100.60: icmp_seq=1 ttl=63 time=74.178 ms
  64 bytes from 10.0.100.60: icmp_seq=2 ttl=63 time=79.649 ms
Securing the Instance
The next step now will be to close down all access to our instance except the IP of our server, this way, all the communication and traffic needs to be done within the VPN

General rule, note the port range
We can do it via adding the following network rule:
Rule with all ports opened from the VPN machine
Our you can just specify the listening UDP port, to do so, we can update our wg0.conf in the client to specify the listening PORT so we do not need to have the range:
1
2
3
4
5
6
7
[Interface]
PrivateKey = <Private key>
Address = 10.0.100.60/24
ListenPort = 60005

[Peer]
...
So, with this, we are done! Our LightSail Instance is secured and hooked up to our VPN!
![]()